Come up and see my etchings December 9, 2007
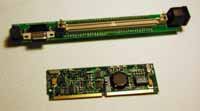
 I finally got around to doing some PCB etching. For my first experimental attempt, I made some little carrier boards for an SMD IC: a M62364FP digital/analog converter, intended for the analog meter project.
It’s been more than a month since I did the toner-transfer with a clothes iron to the copper-clad board (some incredibly thin stuff I bought at the MIT Swapfest a while back), but I’ve been reluctant to break out the ferric chloride and do the actual etching. The transfer was only moderately successful; there was a small degree of smudging. I don’t think the paper moved; I may have used too much pressure and/or heat. The smudging would have been acceptable for a board with larger traces, but it was enough to short some of the board’s traces. I had tried to scrape away some toner with an X-Acto knife before the etching, but that was only moderately (if at all) successful. I may try scraping away the tiny shorts with a diamond-tipped stylus; I think I have one around, somewhere.
The etching took a remarkably long time. I’d pre-heated the ferric chloride by placing the bottle in a tub of warm water, and the ambient temperature was probably 65°F, but it took nearly 30 minutes to complete etching. I etched two, one after the other, and each took about the same length of time. I should have probably left it in even longer; it could have removed the shorts.
While this wasn’t the most successful attempt, it was my first try. I’m optimistic. Once I get some heavier copper-clad board, I’m going to try making the motor controller board. More board, along with some 3A diodes, is in the mail.
 The heart of the beast is an older model
 .") The first challenge is to generate the analog signal for the meters. My original idea was to use 1-Wire digital potentiometers. The TINI supports 1-Wire exceptionally well, which is not surprising, as it has invented by the same people. 1-Wire would let me add meters as needed, just attaching them to the 1-Wire bus; I could then direct data to them by the unique ID of each 1-Wire potentiometer.
The first challenge is to generate the analog signal for the meters. My original idea was to use 1-Wire digital potentiometers. The TINI supports 1-Wire exceptionally well, which is not surprising, as it has invented by the same people. 1-Wire would let me add meters as needed, just attaching them to the 1-Wire bus; I could then direct data to them by the unique ID of each 1-Wire potentiometer.